 Greenland Orchard Journal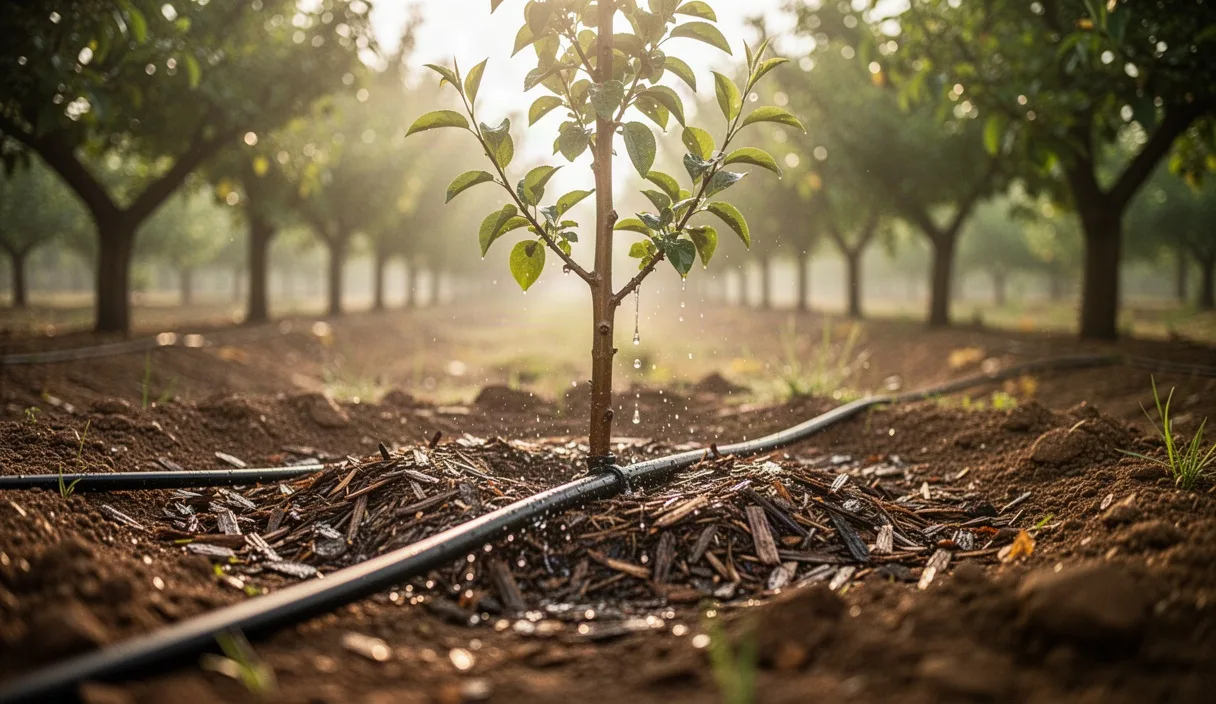
When you plant a young bare-root whip or a potted sapling into your orchard rows, the clock starts on root development. Those small root systems have just arrived in unfamiliar native soil, and they do not have the reach to search out underground moisture reserves on their own. During this first growing season, proper watering is the difference between a tree that puts on sturdy branch growth and one that stalls out or succumbs to midsummer heat stress. At our nursery, we talk with growers every week who worry about giving their trees either too little or too much water.
The goal is straightforward: you want to encourage the young roots to push downward and outward into the surrounding soil profile. To do that, the water must reach the full depth of the planting hole without keeping the root collar waterlogged. A rigid calendar schedule rarely works because weather, soil texture, and wind change the equation from week to week. In this guide, we walk you through the practical field methods we use to monitor soil moisture, build simple delivery systems, and adjust watering volumes through the seasons.
Checking root zone moisture with a soil probe
Before you turn on a hose or open an irrigation valve, you need to know what is happening under the surface. The top two inches of orchard soil can look dry and cracked while the soil around the taproot is still soaking wet. Conversely, a quick shower might wet the surface grass while leaving the root ball bone dry. A basic soil probe, or even an unpainted steel rod measuring 36 inches long, gives you a clear picture of what the tree roots are experiencing.
To inspect a sapling, push your probe into the ground about eight to ten inches away from the trunk. Never drive it right against the base of the stem, where you might gouge the main root flare. In soil with balanced moisture, the probe slides down with moderate, steady hand pressure. If it stops abruptly within the top four inches, your soil is likely parched and hard-packed. If it slides into the earth with almost no resistance, you are likely dealing with oversaturated soil.
For an accurate reading, we recommend an open-slot soil core sampler. Twist the sampler into the ground down to a depth of eight to twelve inches, pull it straight up, and inspect the core. Take a pinch of soil from the bottom of that core and squeeze it between your thumb and fingers:
- Dry soil: Falls apart into loose dust or hard crumbles, leaving no dampness on your skin. Your tree needs an immediate deep watering.
- Ideal soil: Forms a flexible ball that holds together when you bounce it gently in your palm, leaving light dampness on your hand without feeling slick or muddy.
- Saturated soil: Feels slippery, glistens with free standing water, and leaves your palm wet or muddy. Hold off on watering and check again in three days.
Check your saplings twice each week during the spring flush of leaf growth. As the summer heat picks up, check every other day until you understand how quickly your orchard plot dries out.
Deep soaking versus daily light sprinkling
One of the most frequent habits we help new orchardists break is giving their young trees a brief spray with a garden hose every evening. Light sprinkling wets the top two inches of dirt and mulch, but it evaporates within hours once the morning sun hits. Worse, it trains tree roots to stay near the surface where the temporary water lives. When a heat wave hits in July or August, those surface roots bake in hot topsoil, and the tree suffers acute stress.
Deep soaking works on an entirely different principle. When you run water slowly over an extended period, the water percolates past the surface, saturating the soil down to eighteen inches. This mimics the deep soaking of a long, gentle rainstorm. The top few inches may dry out over the following four days, but the lower soil remains cool and moist. The sapling responds by driving feeder roots down toward that deep moisture reservoir, creating a anchored root architecture that will support heavy fruit loads in future seasons.
For a first-year standard or semi-dwarf sapling, deep soaking generally means delivering five to eight gallons of water per session in the spring, rising to eight to twelve gallons during hot midsummer stretches. Rather than watering for two minutes every day, you will apply that full volume once or twice a week. Applying water slowly is critical. If you dump ten gallons from a bucket in thirty seconds, most of it runs off across the lawn, compacting the soil crust and never reaching the roots.
Adjusting volumes for sandy versus clay soils
Your native soil structure determines how fast water moves downward and how long the root zone stays damp. Sandy soils and heavy clay soils represent opposite ends of the spectrum, and each requires a customized delivery rhythm. If you are unsure of your exact soil texture, your local agricultural extension office can run a mechanical soil analysis for a modest fee.
Sandy soil consists of large, gritty mineral particles with generous pore spaces between them. Water drains rapidly through sand, pulling downward with gravity before roots can drink their fill. Because sand holds little moisture, you must water more frequently using smaller portions. If you dump ten gallons on sandy soil in one go, half of that water percolates deep below the root zone where a first-year tree cannot reach it.
Clay soil features tiny, plate-like particles that pack tightly together. It acts like a sponge, absorbing water slowly and holding it for days. If you apply water too fast to clay, it sheets across the top and pools in low spots. If you apply water too frequently, clay becomes waterlogged, driving out all the oxygen from the pore spaces. When roots sit without oxygen, root rot pathogens take over, and the roots begin to die from suffocation. On clay, you must apply water at a very low drip rate, allowing hours for infiltration, followed by a long resting period before the next soak.
| Soil Type | Watering Frequency (Midsummer) | Volume per Session | Application Method | Warning Signs |
|---|---|---|---|---|
| Coarse Sand / Loamy Sand | Two to three times weekly | 4 to 6 gallons | Moderate drip over 45 minutes | Rapid midday wilting, crispy leaf margins |
| Balanced Loam | Once or twice weekly | 7 to 9 gallons | Slow drip over 2 hours | Soil crusting, dull leaf color |
| Heavy Clay / Silt Clay | Once every 7 to 10 days | 8 to 10 gallons | Very slow drip over 4 to 6 hours | Standing puddles, yellowing lower leaves, sour soil odor |
Setting up simple gravity drip lines
You do not need an expensive pressurized pump or an underground plumbing network to water your orchard effectively. A gravity-fed drip system offers a reliable, low-cost way to deliver slow, controlled hydration directly to the root zone of your saplings. You can run this system from a clean 55-gallon food-grade drum or an intermediate bulk container placed near the edge of your orchard rows.
Elevate your water reservoir on concrete cinder blocks or heavy wooden timbers. Raising the tank three to four feet off the ground provides enough head pressure to move water smoothly through a short run of half-inch poly tubing. Every foot of elevation generates roughly 0.43 pounds per square inch of water pressure, which is plenty for low-pressure gravity drip emitters.
Follow these practical measures to set up the line across your orchard row:
- Fit the tank outlet: Thread a three-quarter-inch ball valve into the lower bung of your water drum, and attach a 150-mesh screen filter directly after the valve. Fine particles will quickly clog drip emitters if you skip this filter.
- Lay the mainline: Connect half-inch black polyethylene tubing to the filter outlet using a compression fitting. Roll the tubing down your tree row, securing it every ten feet with metal ground staples so wind does not shift the line.
- Install tree rings: Near each sapling, cut into the mainline and insert a barbed tee. Run a two-foot length of quarter-inch distribution tubing off the tee, circling the tree trunk at a distance of twelve inches. Connect two or three pressure-compensating gravity emitters rated for low pressure along this small loop.
- Cap the run: Place a figure-eight end closure or a threaded flush valve at the far end of the half-inch line. Open this valve once a month for thirty seconds to flush out any fine sediment that slips past the main filter.
Fill your storage tank using a garden hose or collected rain. When it is time to irrigate, open the ball valve and let gravity deliver the water over two to three hours. This slow delivery lets every drop soak directly into the ground without surface erosion or runoff.
Using wood chips to retain ground moisture
Mulching is the most effective way to protect your soil moisture from sun and wind. Bare soil loses moisture to evaporation rapidly during warm weather, and it bakes into a hard crust that resists water penetration. A thick layer of coarse arborist wood chips keeps the soil underneath cool, damp, and populated with earthworms and beneficial fungi that help the tree roots absorb nutrients.
Spread wood chips in a broad circle around each sapling, aiming for a three-to-four-foot radius from the trunk. The layer should sit between three and four inches deep. Finer mulches like double-shredded hardwood or grass clippings tend to mat down into a dense, felt-like barrier that repels water. Coarse wood chips, containing varied pieces of bark, twigs, and heartwood, allow rainwater and drip irrigation to flow straight through to the soil while shading the ground below.
The most important detail is the space immediately around the trunk. Keep the mulch at least four to six inches away from the tree bark. Never pile mulch against the trunk in what landscapers call a mulch volcano. Piling wet organic material directly against tender bark traps moisture, inviting fungal infections, wood-boring insects, and collar rot. It also provides dark cover for mice and meadow voles, which will chew through the bark and girdle the sapling during late fall and winter.
Tapering off irrigation before autumn frost
As summer winds down and late August approaches, your watering schedule needs to change. First-year fruit trees must undergo a natural hardening-off process to prepare for freezing winter temperatures. If you continue to pour heavy amounts of water on your saplings alongside late-season warm spells, the trees will keep pushing tender green shoots. Those soft, succulent tips cannot survive winter freezes and will die back, often leaving entry wounds for fire blight or canker diseases.
Begin watching your saplings in late summer for terminal bud set. You will notice the growing tips on the branches stop unfurling new leaves and form a tight, closed cluster of small scales. This signals that the tree is shifting its energy away from vertical branch growth and toward storing carbohydrates in the root system and thickening its bark.
When you see terminal buds forming, stretch out the time between your watering sessions. If you were watering every five days during midsummer, pull back to watering every ten to twelve days, assuming you receive normal seasonal rainfall. The goal is not to desiccate the tree, but to let the upper soil profile stay dry longer so the tree receives the environmental cue that the growing season is ending.
There is one crucial exception to this late-season dry-down: the late fall hydration soak. After your trees drop their leaves completely in late autumn, but several weeks before the ground freezes solid, give each tree a generous, deep watering. Roots continue basic cellular respiration through the winter, and hydrated soil holds heat substantially better than bone-dry dirt. Moist soil protects the root ball from freezing temperatures, reducing the risk of frost heave and winter root desiccation caused by cold, dry winds.
Common mistakes
Even conscientious growers run into trouble by overlooking small details in the field. Here are four common missteps we encounter every season:
- Watering strictly by the calendar: Turning on your irrigation system every Tuesday and Friday regardless of two inches of natural rainfall creates swampy conditions that drown young roots. Always probe the soil first.
- Wet trunk syndrome: Directing lawn sprinklers or angled nozzles so they splash the trunk and lower foliage invites crown rot and foliar fungal blights like apple scab or cherry leaf spot. Deliver water directly to the soil surface.
- Planting in a clay depression: Digging a deep planting hole in dense clay without creating adequate drainage creates an underground bucket. When you water, the hole fills up and holds standing water around the roots for weeks. Mound your planting rows slightly if you farm on tight clay.
- Applying high-nitrogen liquid fertilizer through irrigation: Pushing heavy nitrogen feeding through your water lines after midsummer prevents dormancy and leaves the sapling vulnerable to winter damage. Keep your late-season water pure.
Next steps for your orchard
Take a walk through your young orchard blocks this week with a soil probe in hand. Test three or four random spots across the rows, particularly near saplings that look slightly sluggish or show curled leaves. Note how deep the probe goes before meeting resistance, and take note of the soil texture at the eight-inch mark.
Once you understand your soil moisture baseline, map out your delivery strategy. If you only have a few trees, five-gallon buckets with two tiny holes drilled in the base can act as simple, portable deep soakers. If you have several rows, measure out the distances and gather the fittings needed for a gravity drip setup before the dry heat of midsummer arrives. If you notice unusual root symptoms, persistent drainage failures, or unexplained wilting that does not respond to watering changes, reach out to your county extension office or an ISA-certified arborist for an on-site evaluation.