 Greenland Orchard Journal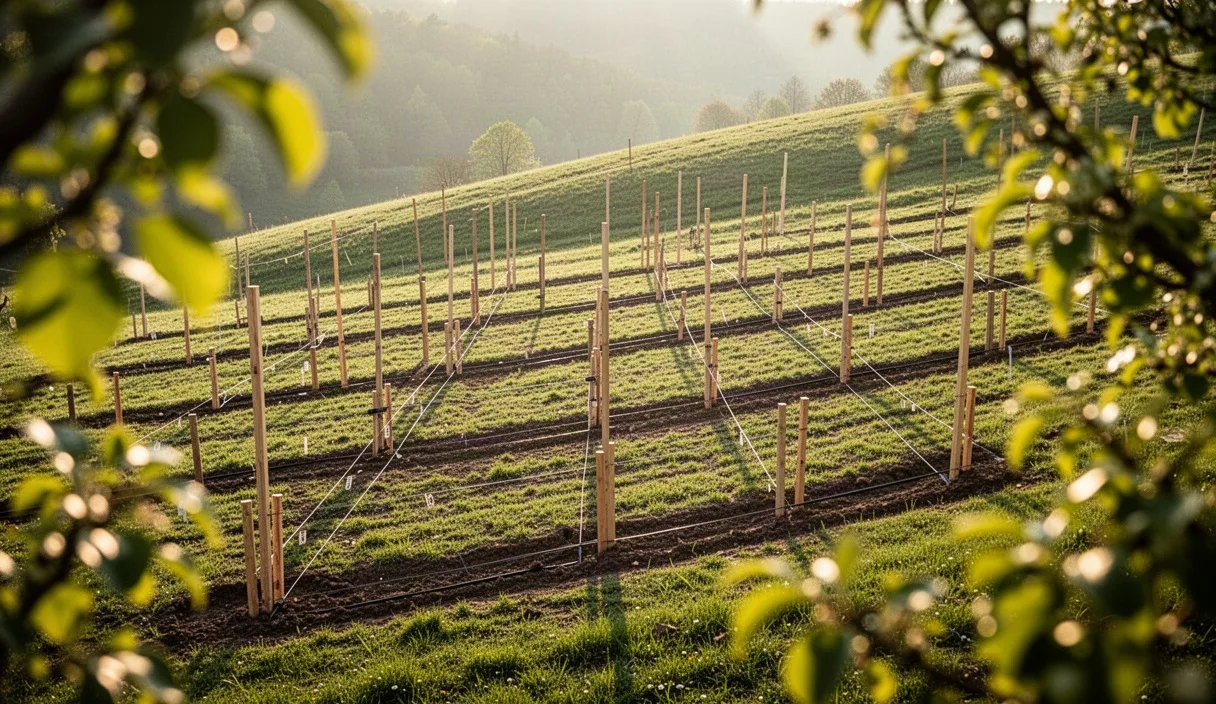
When you take a walk across an empty patch of ground with a bundle of wooden stakes in your hand, it is easy to picture branches heavy with fruit. Getting from that open plot to a healthy harvest takes a bit of quiet planning, mostly around how the sun moves through your sky. Fruit trees need direct sunlight to set flower buds, turn starch into sugar, and dry morning leaves before damp diseases get started. If one tree casts a shadow over its neighbor for half the afternoon, your harvest shrinks and pruning becomes twice as troublesome.
Here at Greenland Orchard, we have laid out our share of planting blocks over the years. Some designs worked well right from the first summer, while others taught us hard lessons about winter shadows and narrow tractor paths. In this guide, we walk through how to position your rows, space your rootstocks, and arrange your tree heights so every branch gets the light it requires. You do not need expensive survey gear, just a tape measure, a notebook, and a few sunny afternoons to watch the ground.
Measuring sun angles across your ground
Before you purchase a single whip, spend time charting where sunlight falls throughout the day. Most deciduous fruit trees need between six and eight hours of unfiltered sun during the growing season. The catch is that the sun sits much higher in the sky during midsummer than it does during early spring when your trees first bloom. A wooden fence or a neighbor's garage might not cast much shadow in late June, but that same structure can blanket your early bloomers in cold shade throughout April.
To get an accurate reading, pick three days to observe your yard: one near the spring equinox in late March, one around the summer solstice in June, and one in late September. If you are planning your orchard mid-season and cannot wait six months, you can calculate the angles using simple shadow measurements. Drive a straight four-foot wooden stake into the center of your plot. Measure the length and direction of its shadow at nine in the morning, at solar noon, and at three in the afternoon. Record these measurements in a notebook along with the time of day.
Watch out for partial obstructions that people often overlook. Deciduous shade trees like mature maples or oaks leaf out in late spring and cast deep, broad shadows just as your fruit begins to swell. Take note of telephone poles, garden sheds, and tall evergreen hedges on your southern and eastern property lines. If a corner of your yard receives fewer than six hours of clear light, reserve that spot for a compost bin, a tool shed, or shade-tolerant berries like red currants rather than top-tier apple or peach trees.
Selecting row direction for maximum light
For most level backyard and small homestead orchards, running your rows north to south is the most reliable choice. When rows run north to south, the morning sun hits the eastern side of the trees, warming the canopy and drying the morning dew. By midday, the sun shines straight down the alleyways between rows, lighting the lower limbs. In the afternoon, the western faces receive full exposure until the sun drops. This arrangement gives both sides of each tree an even share of light and encourages uniform fruit color.
East to west rows can create uneven conditions unless your trees are spaced exceptionally far apart. In an east-west orientation, the south face of the row absorbs heavy light all day, while the northern side stays in continuous shade beneath its own canopy. Over five or six seasons, trees planted this way often develop unbalanced growth, with heavy fruiting wood on the south side and weak, spindly twigs on the north. The only regular exception is when you are training trees as espaliers against a south-facing wall or fence to trap residual warmth in cold climates.
Slope also changes how you position your rows. If your ground drops more than four or five feet over a hundred-foot span, planting straight north to south might cause rainwater to carve gullies down your tractor ruts. In that situation, run your rows slightly off-angle along the contour of the hill. A northwest to southeast angle often provides a workable compromise, keeping soil in place during heavy spring rains while still letting plenty of morning light reach across the rows.
Spacing standards based on rootstock size
The rootstock grafted onto your tree dictates its final spread far more than the fruit variety does. A Honeycrisp on a standard rootstock will reach twenty-five feet wide, while that same Honeycrisp on a dwarf rootstock might never spread past six feet. If you plant trees too close together, their mature branches will interlock. That shade stunts the lower fruiting spurs, forcing all the new fruit into the very top of the canopy where picking requires a tall ladder.
To avoid crowded branches, choose your spacing based on the classification of the rootstock. Here is a baseline guide for open-center and central-leader fruit trees:
| Rootstock Class | Common Examples | In-Row Spacing | Between-Row Spacing |
|---|---|---|---|
| Dwarf | Bud 9, M9, Geneva 41 | 6 to 8 feet | 12 to 14 feet |
| Semi-Dwarf | M26, M7, Geneva 890 | 12 to 15 feet | 18 to 20 feet |
| Semi-Vigorous | MM106, MM111 | 16 to 20 feet | 22 to 25 feet |
| Standard Seedling | Antonovka, Domestic Seedling | 25 to 30 feet | 30 to 35 feet |
Notice that the space between rows is always larger than the space between trees in the same row. This wider alley serves two purposes: it gives equipment room to turn, and it prevents the top of one row from shading the lower half of the adjacent row as the sun tilts across the sky. If you plant semi-dwarf trees fifteen feet apart in the row, an eighteen-foot gap between rows guarantees that low fruiting wood continues to receive daily light even when the trees reach their full maturity at ten or twelve years old.
If your soil is heavy clay or rich river bottom loam, expect trees to grow on the larger side of their range. In rocky, thin mountain ground, rootstocks stay slightly smaller. Adjust your tape measure accordingly, and when in doubt, give the tree an extra foot or two of breathing room.
Staggering heights to avoid midday shade
A well-balanced small orchard rarely contains only one type of fruit tree. You might want two standard sweet cherries, four semi-dwarf apples, three dwarf pears, and a row of thornless blackberries. If you scatter these mixed sizes randomly across the plot, the tall trees will cast long shadows over the smaller ones, especially in late summer when the sun begins its downward seasonal path.
The rule of thumb for mixed plantings is simple: put your tallest growers to the north and your shortest plants to the south. By placing standard cherries, vigorous pears, or seedling walnuts along the northern boundary of your land, their long shadows fall harmlessly onto the fence line or open lawn behind them. Moving south through your plot, step down to semi-dwarf apples, then to dwarf plums or peaches, and finally to low berry bushes or strawberry beds on the southern edge.
You can also stagger the tree placements from one row to the next using an offset or diamond pattern rather than a rigid grid. Instead of planting a tree directly across the lane from another, shift the second row down by half your tree-spacing distance. This creates open viewing windows between canopies:
- Low-angle morning light slips diagonally between trunks to reach inner leaves.
- Air circulates more freely through the orchard floor, reducing fungal spore pressure.
- Pollinating insects find clear flight paths from flower to flower.
- Ladders can be leaned and positioned without tangling into neighboring canopies.
Stone fruits like peaches, nectarines, and Japanese plums demand special placement when staggering. They bloom earlier than apples and need every scrap of early heat they can get. Place your stone fruits where they catch full morning light and remain protected from cold north winds by a distant windbreak or the taller apple rows to their north.
Leaving clear access lanes for carts and mowers
It is tempting to squeeze an extra tree into the end of every row, but you will regret that choice every time you try to turn a loaded utility cart or garden tractor. Trees grow wider than most beginners anticipate. A semi-dwarf branch trimmed back during winter will push out eighteen inches of soft leafy growth by late June. If your access lane was tight to begin with, those drooping green shoots will scrape your shoulders and knock ripening fruit to the ground as you pass.
Start by measuring your widest piece of equipment. If you use a forty-two-inch riding mower, you need at least eight feet of open ground between the mature drip lines of your rows to pass through without brushing foliage. Add the mature spread of the trees to your equipment width to determine your row centerlines. For example, if your trees spread ten feet across (five feet on each side of the trunk) and your mower needs eight feet of clean passage, your tree rows must be spaced at least eighteen feet apart from center to center.
Do not forget the headlands, which are the open turn-around spaces at the ends of your rows. When you haul a cart full of damp prunings or heavy harvest crates, you need room to pivot without backing up into a trunk or crushing drip irrigation lines. Leave a clear lane of at least fifteen to twenty feet between your last tree in each row and any perimeter fence, ditch, or property boundary. This turnaround buffer also provides a convenient parking area for tool carts, sprayers, and collection bins during harvest weeks.
Common mistakes
We see several layout missteps happen year after year on small acreage properties:
- Planting based on seedling size: Spacing small bare-root whips based on how they look on planting day rather than their size at eight years old.
- Ignoring underground services: Digging without checking where water lines, electrical conduits, or septic drain fields run. Call your local utility locator service before breaking ground; tree roots can cause expensive damage to underground infrastructure.
- Forgetting midday canopy sag: Failing to account for how heavily laden branches droop in late summer, which temporarily cuts down lane width by up to two feet on each side.
- Planting into cold frost pockets: Setting early-blooming stone fruits at the very bottom of a slope where cold air settles on clear spring nights.
- Over-crowding the nursery stock: Ordering twenty trees for a plot that comfortably holds twelve, leading to delayed pruning and dense, humid canopies.
Taking your next practical steps
The best way to start your orchard layout is on a sheet of quad-ruled graph paper. Let each square represent two feet of real ground. Draw your property boundaries, mark any permanent structures like sheds or tall boundary trees, and sketch the true north arrow clearly in the margin. Draw out your proposed tree circles at their mature canopy diameters so you can see where shadows and pathways will fall.
Once your paper plan feels balanced, head outside with a hundred-foot tape measure, a mallet, and some brightly painted survey stakes. Drive a stake into the ground for every single tree trunk. Step back and walk the rows. Push your wheelbarrow down the lanes, turn your mower around at the end stakes, and stand where the shortest trees will go to make sure no tall structure blocks your southern view. Making adjustments by pulling up a wooden stake takes two minutes; moving a three-year-old rooted tree takes hours of shovel work and risks setting the tree back by an entire season. Take your time with the stakes, watch the sun for a few more days, and your trees will thank you with steady fruit for decades to come.