 Greenland Orchard Journal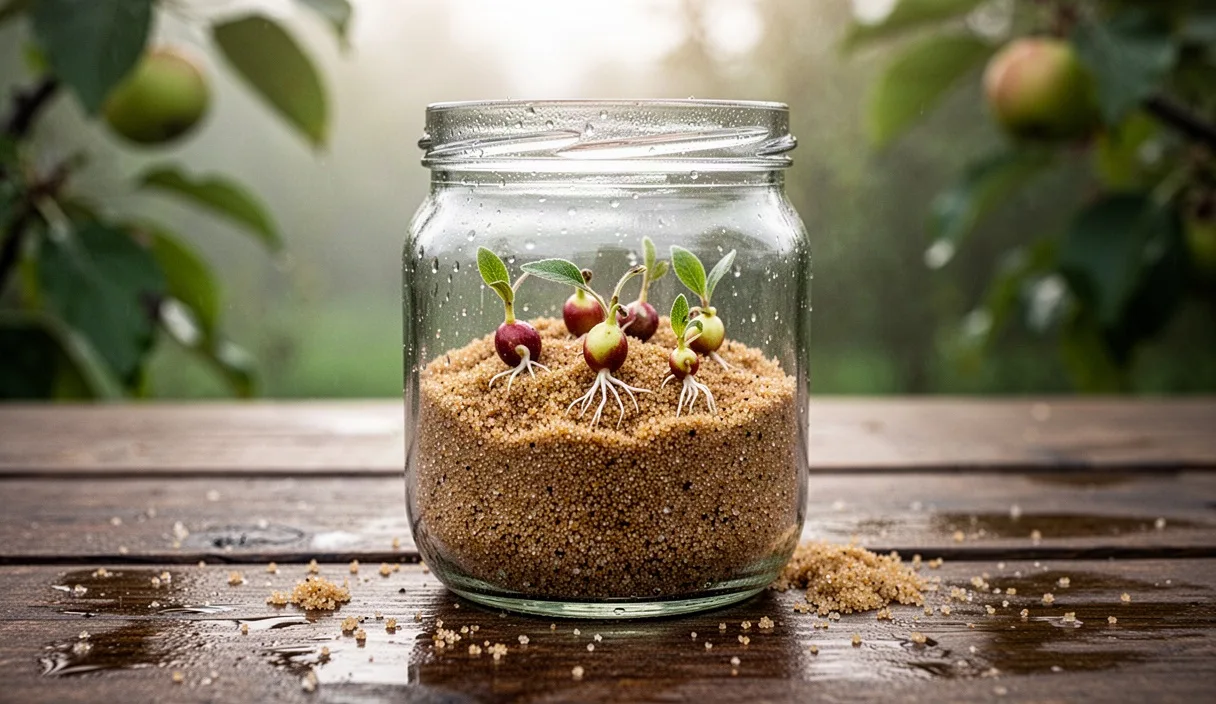
Every autumn around our packing shed, we sweep up fallen apples and press out fresh cider. It is our favorite time of year, but it is also the season when visitors ask us if they can plant the brown seeds left behind in their cider cores. The short answer is yes, you certainly can. Growing an apple tree from a pip is one of the most rewarding small projects you can take on in your home garden, provided you have a little patience and a clear spot in the family refrigerator.
Before you get started, we always remind folks that apples do not grow true to seed. If you save a pip from a Honeycrisp or a Bramley, the tree you grow will be a brand new individual, a half-wild cousin with traits borrowed from both the parent tree and whatever nearby crabapple pollinated the blossom. Some turn out sour, some make brilliant cider fruit, and some produce sturdy rootstocks for future grafting. To coax those pips to wake up in the spring, you have to recreate winter. In orchard terms, we call this cold stratification, and here is exactly how we handle the process in our own workshop.
Harvesting pips from fully ripened fruit
The journey starts with picking the right fruit. You want apples that have stayed on the tree until they are fully ripe, or even slightly overripe. In our experience, seeds gathered from under-ripe, wind-fallen apples early in August rarely possess the energy required to sprout. When an apple is fully ripe, its seeds turn from a pale ivory or light tan to a deep, dark chestnut brown. That change in coat color tells you that the embryo inside has finished drawing nutrients from the tree.
To extract the seeds safely, slice around the equator of the apple rather than cutting straight down through the stem and core. Cutting straight through the core can nick or slice the seeds in half. Once you cut around the perimeter, twist the two halves in opposite directions until the core pops open. Gently prise the pips out using the tip of a dull table knife or your fingernails. Avoid using sharp kitchen blades, as a tiny scratch in the seed coat gives mold an easy doorway inside.
We suggest gathering at least twenty to thirty pips from three or four different apples. Because genetics vary widely and wild seed vigor is unpredictable, some will simply fail to wake up, and others may grow weak stems. Starting with a generous handful gives you the freedom to select only the healthiest, stockiest seedlings once spring arrives.
Washing and drying to prevent fungal rot
Once you extract your pips, they carry a thin coating of apple pulp, natural sugars, and fruit acids. If you place a seed coated in fruit sugars straight into a moist storage medium, blue mold or black rot will almost certainly claim it before the winter is out. Washing is not an optional detail; it is the most critical sanitation task of the whole project.
Place your harvested pips into a small glass bowl filled with tepid tap water. Rub them gently between your fingers to scrub off any clinging bits of fruit flesh. As you wash them, you will notice something helpful: some seeds will sink directly to the bottom, while others bob along on the surface. We always skim off and discard the floaters. Floating seeds generally have hollow interiors or shriveled embryos that never filled out properly. The dense sinkers are the viable seeds you want to keep.
After rinsing them clean in fresh water, spread the seeds out onto a clean linen tea towel or a layer of unbleached paper towels. Let them sit on the kitchen counter for roughly eighteen to twenty-four hours to dry the outside hull. You do not want to bake them in direct sunlight or place them near a radiator, because extreme heat will kill the sleeping embryo. You simply want the hard outer shell to feel dry to the touch so that moisture does not get trapped under surface mold during the first week of storage.
Choosing moist peat or coarse sand
To break their natural chemical dormancy, apple pips require two things together: dampness and sustained cold. The medium you choose to hold the seeds should balance moisture retention with excellent aeration. If the medium is too dense, the seeds will suffocate; if it is too loose, they will dry out before winter ends. In our shed, we use either sifted sphagnum peat moss, horticultural vermiculite, or sharp river sand.
Milled peat moss is naturally acidic and carries mild anti-fungal properties, which helps keep surface molds at bay. However, coarse sand is easier to clean off the delicate white roots when the seeds sprout early. You can pick whichever material you have on hand in your garden shed. The key is getting the moisture level correct before the seeds ever touch the medium.
| Medium | Moisture Holding | Air Circulation | Handling Ease at Sprouting |
|---|---|---|---|
| Milled Sphagnum Peat | High | Moderate | Easy, soft on new roots |
| Horticultural Vermiculite | Very High | High | Very easy, clean separation |
| Sharp Horticultural Sand | Moderate | Very High | Firm, requires gentle rinsing |
| Damp Paper Towel | Low to Moderate | Low | Roots often tangle in paper fibers |
To test your medium, add warm water a few tablespoons at a time, mixing thoroughly with your hands. Grab a tight fistful of the mixture and squeeze firmly. If water streams out between your knuckles, it is far too wet, and you should add a handful of dry material. You want the medium to hold its shape when you open your palm without dripping more than a single drop of water. We call this the damp sponge standard, and it is the sweet spot for apple seeds.
Refrigerator timing and temperature targets
In nature, wild apple seeds lie beneath fallen leaves and snow for months, waiting for warm spring sunshine. We imitate this by storing our prepared containers inside a domestic refrigerator. The ideal temperature range for cold stratification is between 1 and 4 degrees Celsius (roughly 34 to 40 degrees Fahrenheit). At these temperatures, the biochemical inhibitors inside the seed shell break down slowly without letting dangerous molds proliferate.
Mix your clean seeds into your prepared medium, ensuring they do not touch one another. Place the mixture inside a resealable plastic bag or a shallow plastic food container. If you use a bag, leave the seal open about two centimeters at the corner to allow oxygen to exchange. If you use a solid tub, poke four or five tiny holes in the lid with a push pin. Living seeds continue to respire at a tiny, slowed-down rate during their chill period, and fresh air keeps them vigorous.
Label the container clearly with the apple variety, the source tree, and the date you tucked it into the cold. Apple seeds generally need between seventy and ninety days of continuous chilling before they will wake up reliably. If your refrigerator tends to run colder than 1 degree Celsius, the process slows down. If it drops below freezing, the seeds will enter deep freeze dormancy rather than stratifying, which resets or halts the biochemical clock.
Recommended refrigerator placement
- Salad Crisper Drawer: The best spot in most homes. It keeps a stable temperature and protects the bag from drying fan drafts.
- Middle Shelf, Rear Corner: A solid secondary choice if your crisper is packed with produce, provided it stays above freezing.
- Avoid Refrigerator Doors: The door swings open multiple times every day, creating temperature swings that disrupt the resting cycle.
- Keep Away from Ripe Bananas: Storing your seeds next to ethylene-producing fruits like ripe bananas or cantaloupes can damage the developing embryos.
Checking moisture levels during winter
Once your pips are resting in the fridge, your work is mostly a matter of regular monitoring. We mark our calendar to check our seed packets every ten to fourteen days throughout December, January, and February. The goal during these check-ins is to catch mold early and make sure the packing medium has not dried out under the dry air circulation of your appliance.
Open the container completely and inspect the mixture under a bright lamp. Take a deep sniff. It should smell like fresh woodland soil or clean rain. If you catch a sour or fermenting smell, the medium is too wet. If you spot a white, fuzzy patch of mold around a single pip, remove that pip immediately and throw it out. You can spritz the surrounding medium with a tiny misting of clean water if it looks crumbly and pale, but do so with a gentle hand. A single spray from a fine hand mister is usually plenty.
Around day sixty or seventy, start looking closely at the pointed tip of each seed. As dormancy breaks, the brown seed coat will crack open, and a tiny, pale cream root called a radicle will push its way into the world. When you see those little white hooks appearing, you know your stratification was successful. Once a root emerges, that pip must be moved into potting compost within a few days, or the tender root will twist, rot, or break.
Potting up sprouted pips in early spring
When the radicles stretch to about one or two centimeters in length, it is time to move the babies out of the fridge and into small pots. We prefer individual plastic seedling pots or deep cell trays that measure at least eight to ten centimeters deep. Apple trees produce a vigorous, downward-growing taproot right from the start, so shallow seed flats will cause the roots to bunch and circle far too early.
Fill your pots with a lightweight, free-draining potting compost made of peat or coco coir blended with coarse perlite. Avoid using heavy garden topsoil in small pots, as it compacts into a brick when watered indoors and starves the root system of oxygen. Water the soil thoroughly and let it drain until it is evenly moist throughout.
- Make a small planting hole in the center of the pot using a pencil, roughly one to two centimeters deep.
- Carefully lift the sprouted pip out of the stratification medium by holding the seed coat, never by pinching the delicate white root.
- Lower the pip into the hole with the root tip pointing downward into the compost.
- Gently cover the seed with loose compost, leaving the brown hull just beneath the soil surface.
- Settle the soil around the seed with a light mist of water from a spray bottle to eliminate air pockets.
Set your newly potted pips on a bright, cool windowsill that receives plenty of indirect natural light, or place them under a basic LED grow light for fourteen hours a day. Keep the room temperature around 18 to 21 degrees Celsius. Within seven to twelve days, the seed will push upward, shed its brown coat, and open its two round seed leaves, known as cotyledons. Once you see those bright green leaves unfurl, you have officially grown your first apple seedling.
Common mistakes to avoid
Over the years, we have seen customers run into the same handful of troubles when trying to stratify seeds on their own. Keeping an eye out for these errors will save you time and protect your seedlings.
- Skipping the washing phase: Leaving sweet fruit pulp on the shell almost guarantees mold outbreaks within three weeks.
- Over-saturating the medium: Standing water in the bottom of your bag drowns the seed embryo, turning the pip black and soft.
- Freezing the seeds: Putting the pips in the freezer does not speed up the clock; stratification requires cold liquid water inside the seed tissues, not ice.
- Rough handling of sprouted roots: The young radicle snaps easily. If the root breaks off during planting, the pip will rarely recover.
- Using unsterile garden soil indoors: Garden soil introduces weed seeds, fungus gnats, and damping-off fungi into your seedling pots.
Practical next steps for your orchard
Once your seedlings develop two or three sets of true leaves, they will start growing rapidly. Keep them evenly watered, allowing the very top layer of compost to dry between waterings so the roots search downward. As the spring weather settles and the threat of hard frost passes in late April or May, begin hardening off your young trees by placing them outdoors in dappled shade for a few hours each afternoon.
By midsummer, healthy seedlings will stand fifteen to thirty centimeters tall and can be potted on into larger four-liter nursery containers. Keep a watchful eye out for common pests like green aphids or powdery mildew, which love soft, young orchard growth. If you notice persistent leaf curling, yellowing veins, or fungal spots that simple manual removal does not resolve, bring a leaf sample to your local agricultural extension agent or an experienced nursery professional for diagnosis. With good care, your backyard seedlings will grow into stout young saplings, ready for permanent planting or top-grafting by the coming autumn.